With access to WHM, you have the ability to customize the branding of your cPanel accounts by incorporating your company logo, colors, and other elements. Although there are numerous branding options available, this article is intended to provide an overview of the topic.
How to Create a new cPanel Theme
To edit your cPanel theme or style, you must first create a new one to work with. This involves making a copy of the default brand within cPanel, which you can then modify to suit your needs.
- Log into your WHM
- Click “Branding” in the left menu under the “cPanel” heading
- Click “Live Editor” next to the theme you would like to manage. The default theme for cPanel is currently x3.
- Click “Create or Upload Branding“
- Under “Create a new branding style“, enter a name for your new brand and click “Create“. In our testing, we created, “Test Brand ABC”.
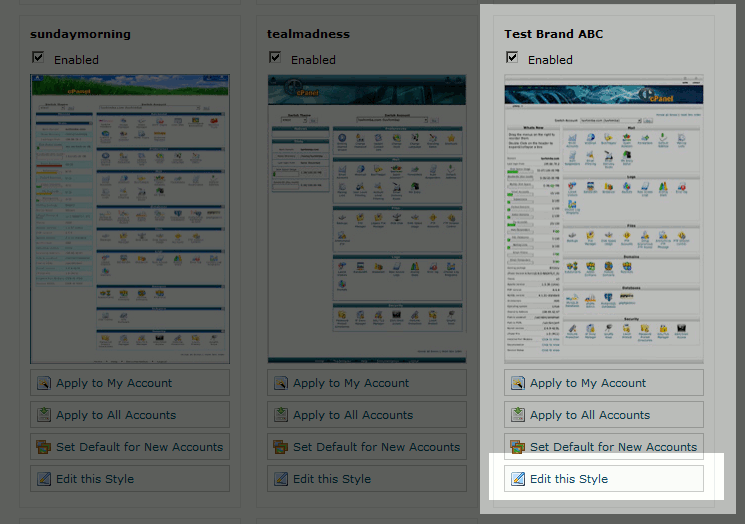
- When the new brand is created, you should see a message similar to, “The branding style Test Brand ABC was successfully created.”. When you see this, your new brand has been created. Click “Go Back to Branding Editor“. When you arrive to the “Branding Editor“, you should see your new brand listed, as seen in the screenshot below:
How to modify your new cPanel Theme

After you have created your new brand, it will display in the “Branding Editor” page, which you should be at if you have been following along with the steps above. To begin editing your new brand, click the “Edit this Style” link under your new brand:

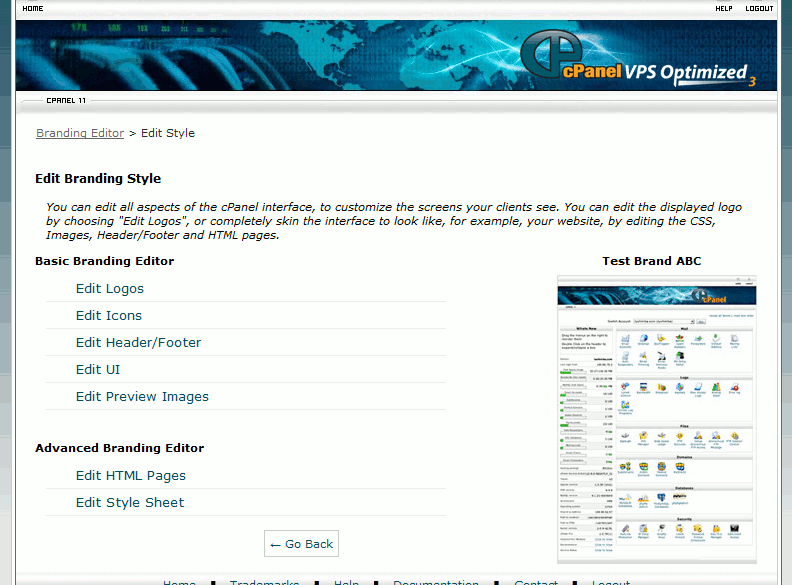
On the “Edit Branding Style” page, you’ll see the options that you have available in customizing your brand. These include options such as uploading a custom logo and customizing the header, modifying your footer and even overriding the global stylesheet.
How to apply your new theme to a cPanel account
When you’ve completed customizing your new brand, you can then apply it to cPanel accounts that your reseller owns. You’ll need to access the “Branding Editor” page to do this. You can get to your “Branding Editor” page by:
- Log into your WHM
- Click “Branding” in the left menu under the “cPanel” heading
- Click “Live Editor” next to the theme you would like to manage. The default theme for cPanel is currently x3. When applying the theme, you have several options: Apply to My Account
This will change the style of your cPanel account and all cPanel accounts owned by your reseller. Apply to All Accounts
This will apply the new style to all accounts already created. Set Default for New Accounts
This will use the style for all new accounts created. It will not adjust the style of current accounts, so in addition to this option you may also want to either “Apply to My Account” or “Apply to All Accounts”
