In this guide, we will demonstrate how to create a cPanel account in WHM. The benefit of using WHM is that you can manage and host multiple cPanel accounts that are isolated from one another. This means that each cPanel user has their own separate environment, or “sandbox,” for their websites and email, and they are not aware of other users on the same server.
Moreover, you can customize the limitations and restrictions for each cPanel account based on their website’s purpose or the cost of reselling. For instance, if you are hosting a simple “business card” website for a client who requires minimal resources, you can set limits on their bandwidth and disk usage, and charge them a lower fee than for a more resource-intensive site.
It is important to note that cPanel creation is no longer unlimited, and you should refer to the cPanel Pricing Changes for more information on the pricing structure. You can also find details about the new pricing for cPanel licenses and FAQs related to the changes.
Creating cPanel Account
- Log in to WHM.
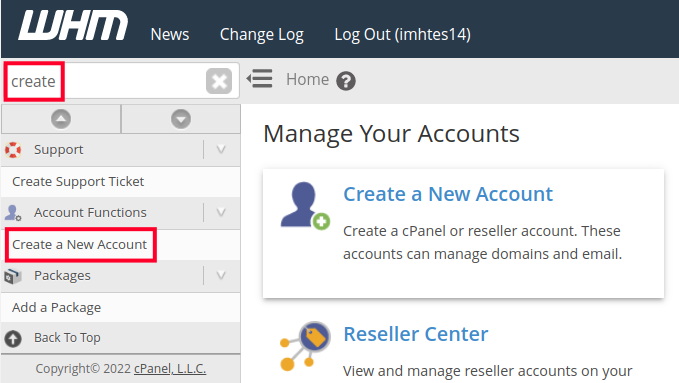
- Type “create” in the search box then click Create a New Account in the Account Functions section.
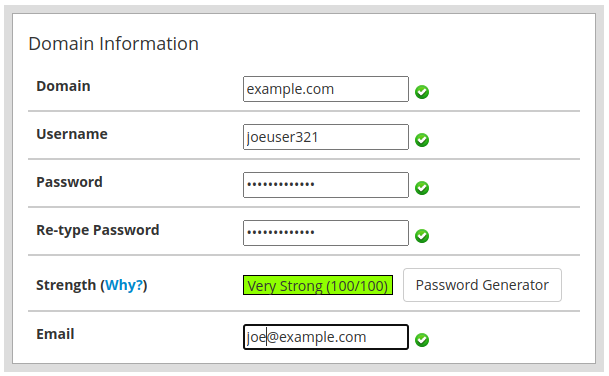
- Fill in the fields on the Domain information page. Below is a description of the options: DomainThe primary domain name for the cPanel account.UsernameUsername for logging into the cPanel.PasswordPassword for logging into the cPanel.EmailEmail address to receive cPanel account notifications.
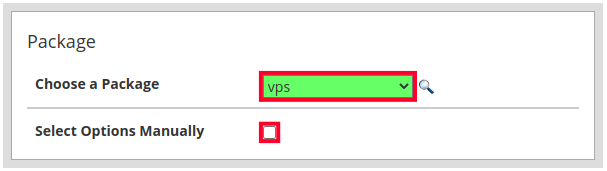
- Select the desired package from the dropdown menu or check the Select Options Manually box to choose custom resource options. See our full guide for more information on how to create a package in WHM.
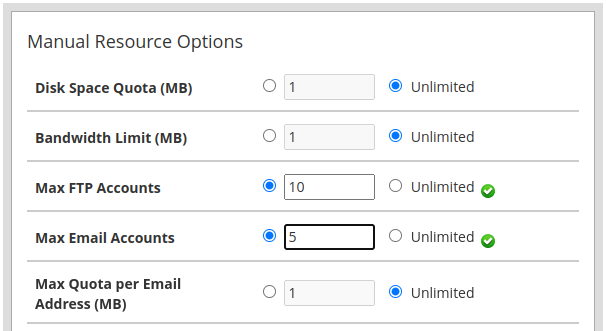
- If you chose to select your options manually you can set limitations for disk space, bandwidth, and databases or make them unlimited.
- Select your default theme and locale then choose your SpamAssassin settings.
cPanel theme layout and design of the cPanel dashboard.LocaleDefault language for the cPanel.Enable Apache SpamAssassinSpamAssassin is an email filter that can flag suspected spam messages or send them to a spam box. Enable Spam BoxIf you enabled SpamAssassin it will automatically add a spam flag to the subject line of messages and deliver them to your inbox. But when you enable the spam box they will be sent to a separate spam folder instead.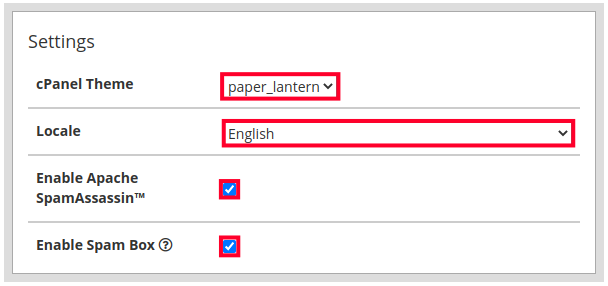
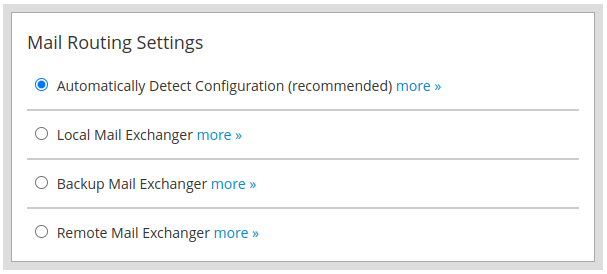
- Set the Mail Routing Settings. Automatically Detect ConfigurationcPanel looks to the MX records to determine whether to send mail locally or remotely. Local Mail ExchangerUse when mail is expected to always come to the local server. Backup Mail ExchangercPanel will use the local server if remote mail attempts fail. Remote Mail ExchangerUse when mail is expected to be sent elsewhere (third-party email).
- Set your DNS Settings. For more information, see our article on SPF and DKIM settings.
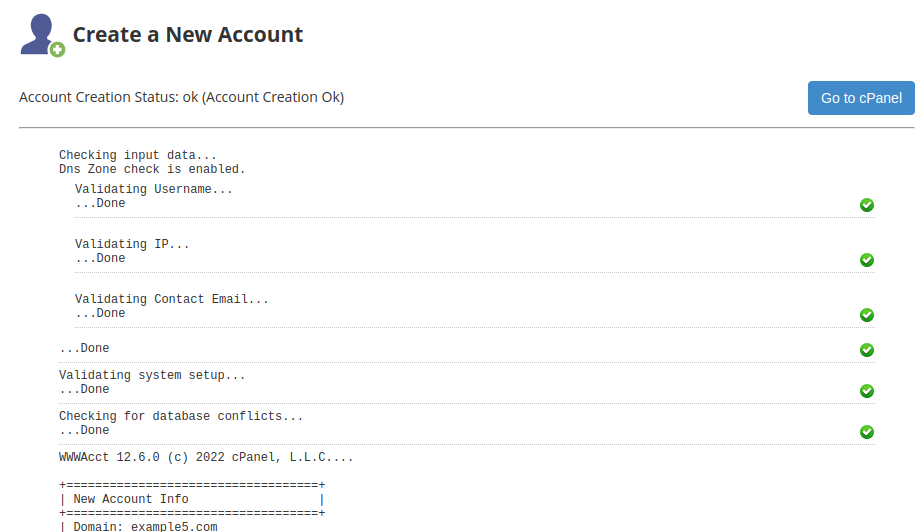
Enable DKIM on this accountDKIM (DomainKeys Identified Mail) helps verify that an email was not modified and came from a valid sender. Enable SPF on this account (Sender Policy Framework) records are used to identify the servers that are allowed to send mail for your domain. A recipient server can then check the SPF record when an email is received and confirm it was sent from a valid server. Use the nameservers specified at the Domain’s RegistrarThis will disregard any nameserver settings you may have in your cPanel and follow the registrar instead. Overwrite any existing DNS zones for the accountEnable to remove and replace any existing DNS zones with this latest record. - Click on the Create button. Your new cPanel account will then be set up and when it is complete you will see a “Account Creation Ok” message along with a summary log.