This article will provide you with a basic process to split a single cPanel account into multiple cPanel accounts. This can be done only on a VPS or dedicated server plan with access to WHM (Web Host Manager). Separating your domains into different cPanel accounts can help you better organize your sites and easily grant access to multiple end-users.
In this example, we have a cPanel account called “userna1” with the primary domain name “PrimaryDomain.com” and an addon domain “AddonDomain.com”. We will be splitting the “AddonDomain.com” site into its own separate cPanel account. This way, we can give a developer full FTP and cPanel access to the site without worrying about them accessing anything on our “PrimaryDomain.com” account.
It’s worth noting that cPanel creation is no longer unlimited. Please check out the cPanel Pricing Changes and related FAQs for more information.
If you have root access to your server, you may want to check out our advanced article on splitting a cPanel account into multiple accounts using SSH.
Both of our example sites use WordPress and have a MySQL database set up. They also have one email account set up with mail in it.
- We want to first grab all of the content for the AddonDomain.com site via FTP. However we’ll want to actually connect via FTP using the primary site’s username, so in this case userna1. That way we can grab the mail files for that site as well.
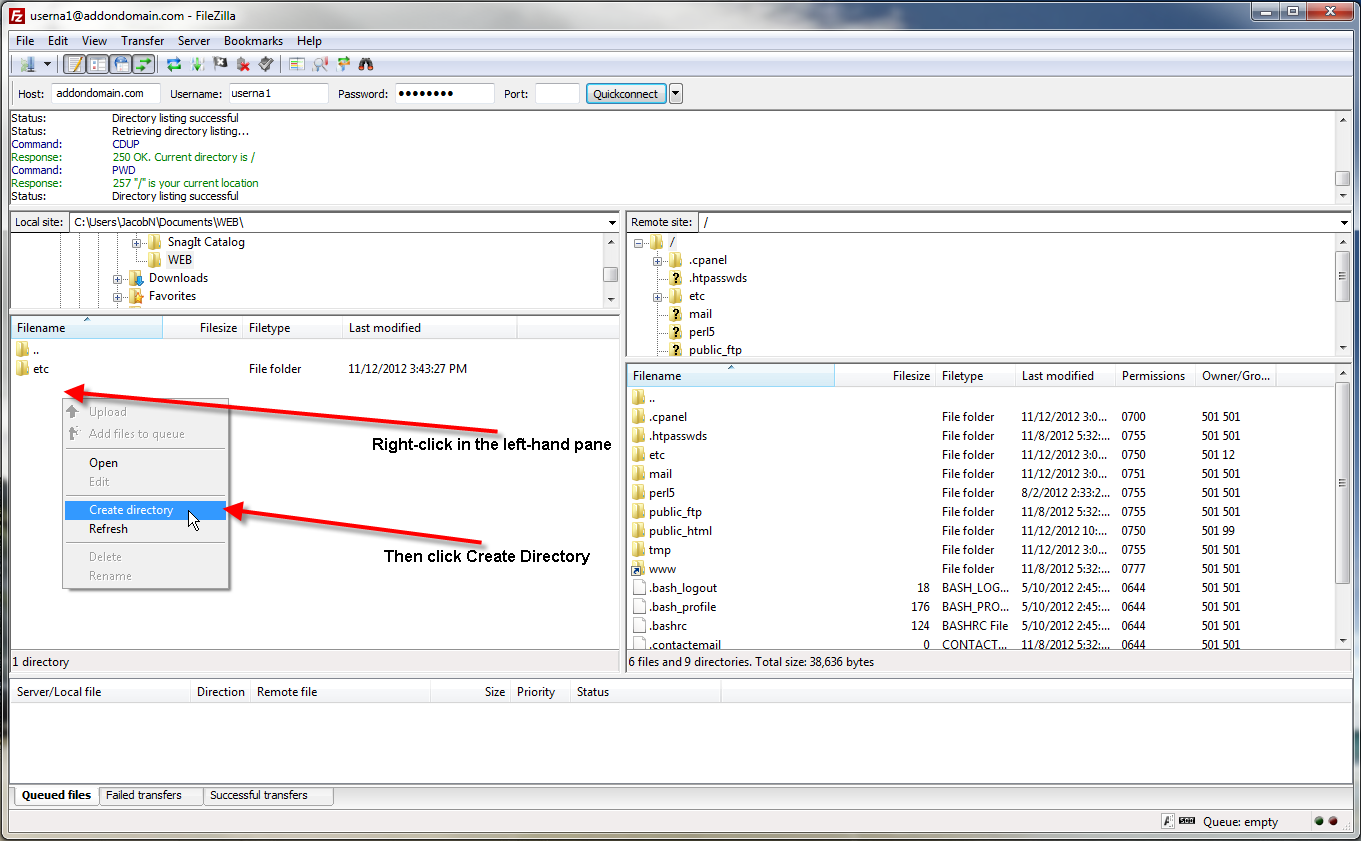
- In this example we’re connected using FileZilla, with the server’s files on the right-hand side, and our local folders on the left. First we are going to right-click in the left-hand pane and select Create directory, in the pop-up to name the new directory we want to type in etc then click OK.
- Again we are going to right-click in the left-hand pane and select Create directory, in the pop-up to name the new directory we want to type in mail then click OK.
- One last time we are going to right-click in the left-hand pane and select Create directory, in the pop-up to name the new directory we want to type in public_html then click OK.
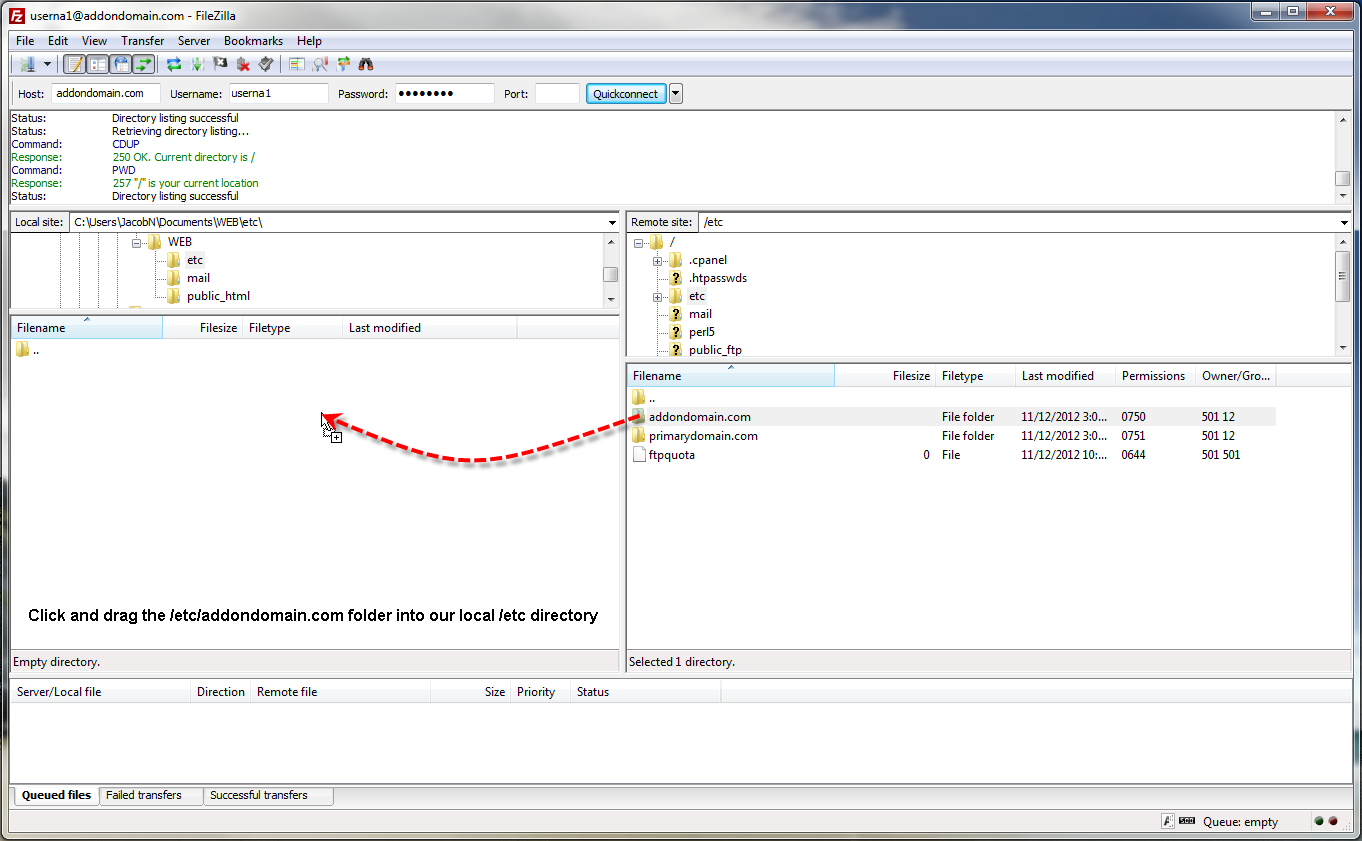
- In both window panes navigate to the etc directories, then drag the server-side AddonDomain.com directory into our empty local etc one.
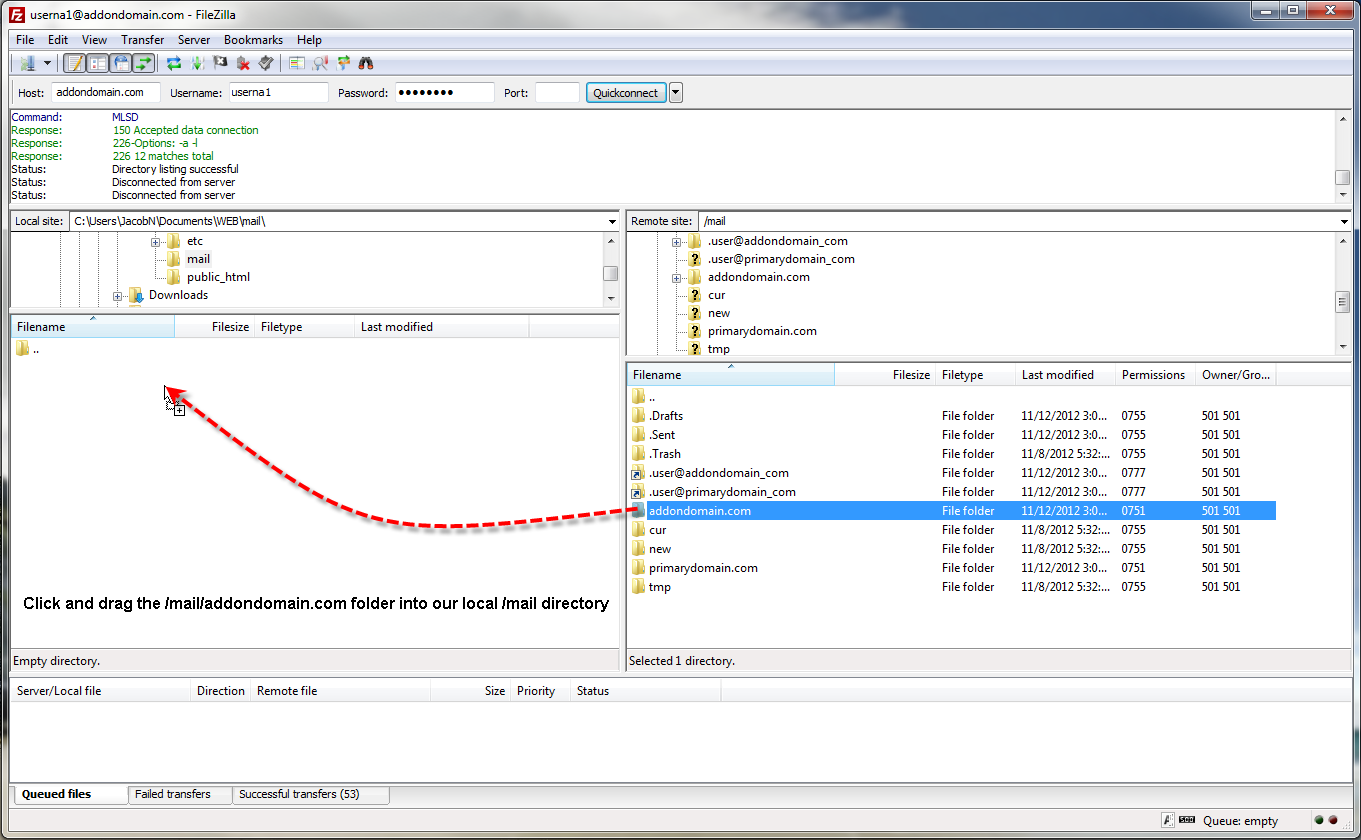
- In both window panes navigate to the mail directories, then drag the server-side AddonDomain.com directory into our empty local mail one.
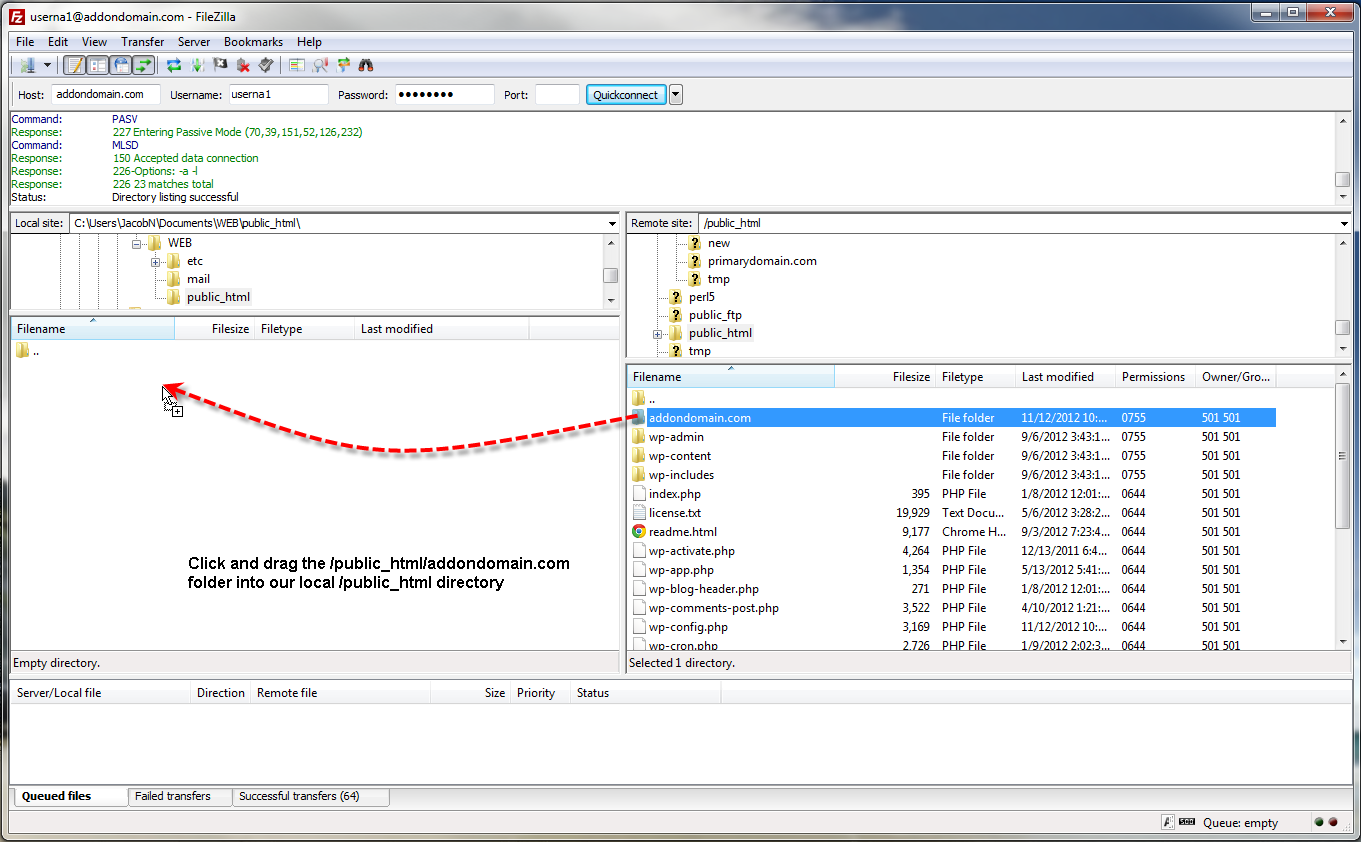
- Now in both window panes navigate to the public_html directories, then drag the server-side AddonDomain.com directory into our empty local public_html one.
- Now we want to also generate a backup of our MySQL database that we need for the site, in order to do this you’ll want to Login to your cPanel.
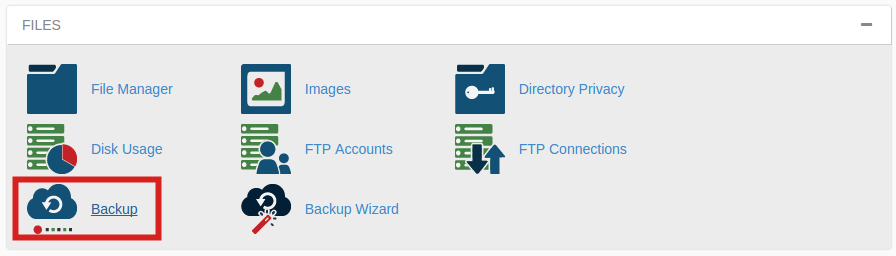
- Once logged in, navigate down to the Files section then click on Backup.
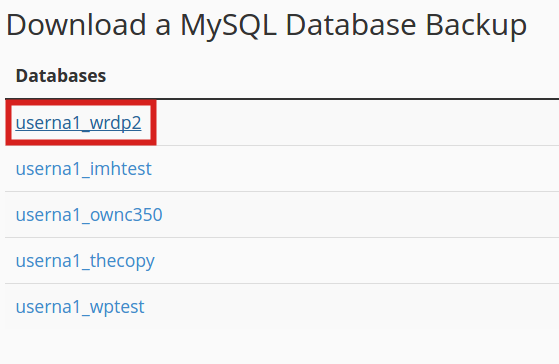
- Under the Download a MySQL Database Backup section click on the database you need to backup, in this case we’ll be downloading the userna1_wrdp2 database. You should notice you can also download any Email Forwarders or Email Filters you had setup from the section as well.
- We should now have everything we need to recreate the site under a different account. The first thing you’ll want to do is Log into WHM.
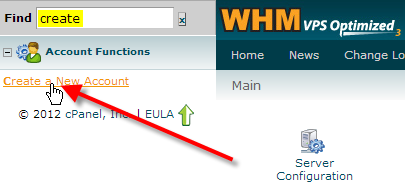
- In the top-left Find box type in Create, then click on Create a New Account.
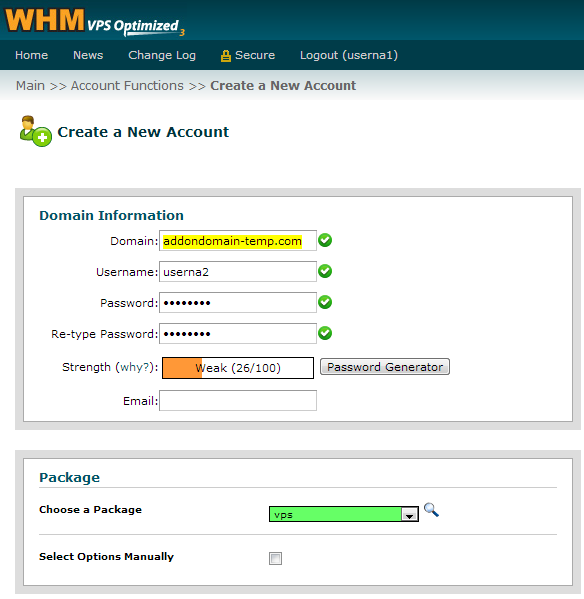
- Now for the Domain: you’ll want to enter your domain with a -temp.com suffix, that way we can test and get the account up and running prior to shutting down the real site. So in our example we’re using AddonDomain-temp.com, you can then choose a username and password you’d like this new cPanel to use, and in the Choose a Package drop-down you’ll want to select the default vps package or whatever custom package you might have set up.After entering in all the information scroll to the bottom of the page and click on Create
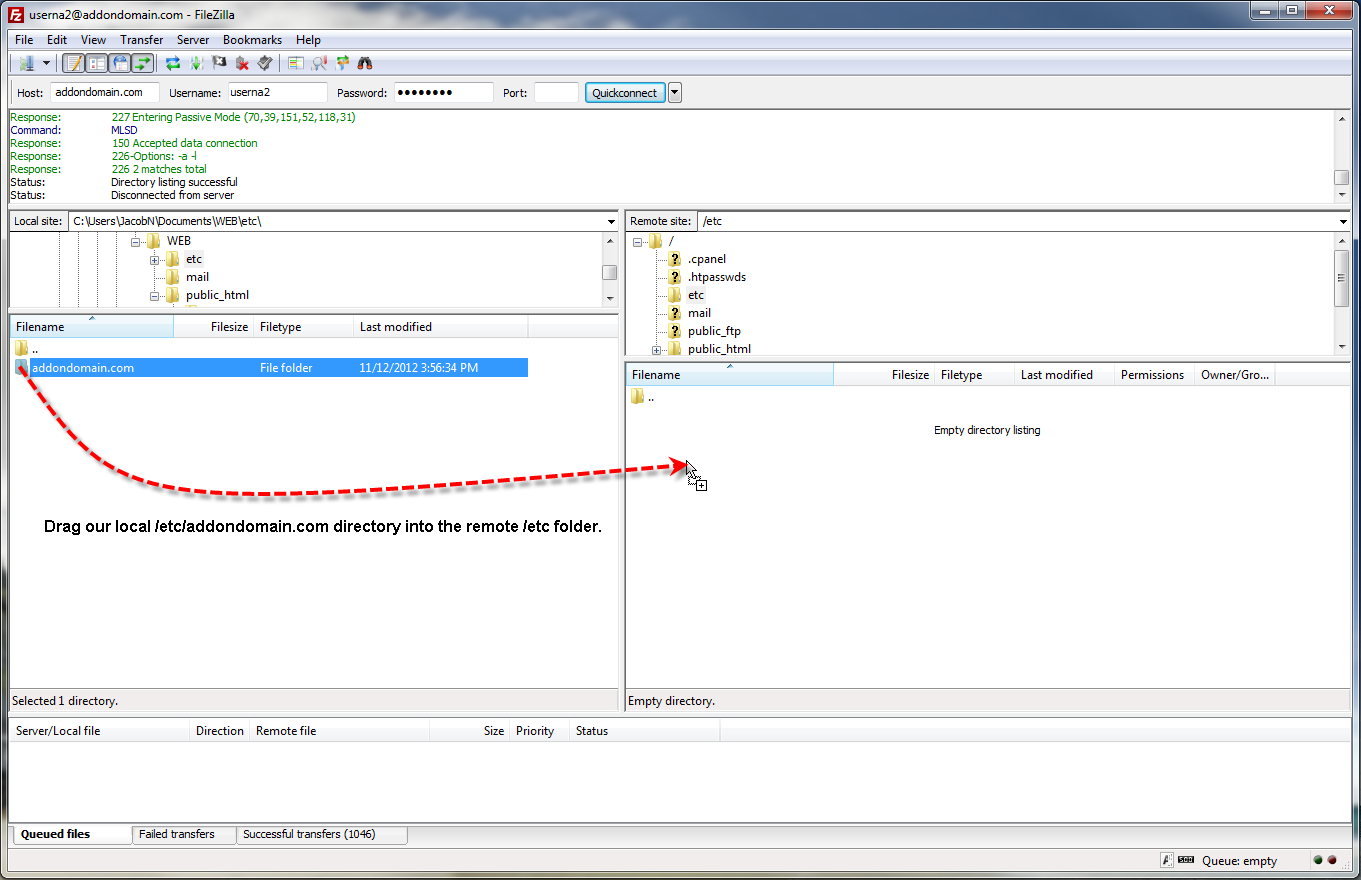
- Now you’ll want to connect to the new account you just created with FTP using one of your domain’s as the hostname and your new username userna2 in this case. Next navigate to the etc directory in both windows, then drag the AddonDomain.com directory from the left pane into the right.
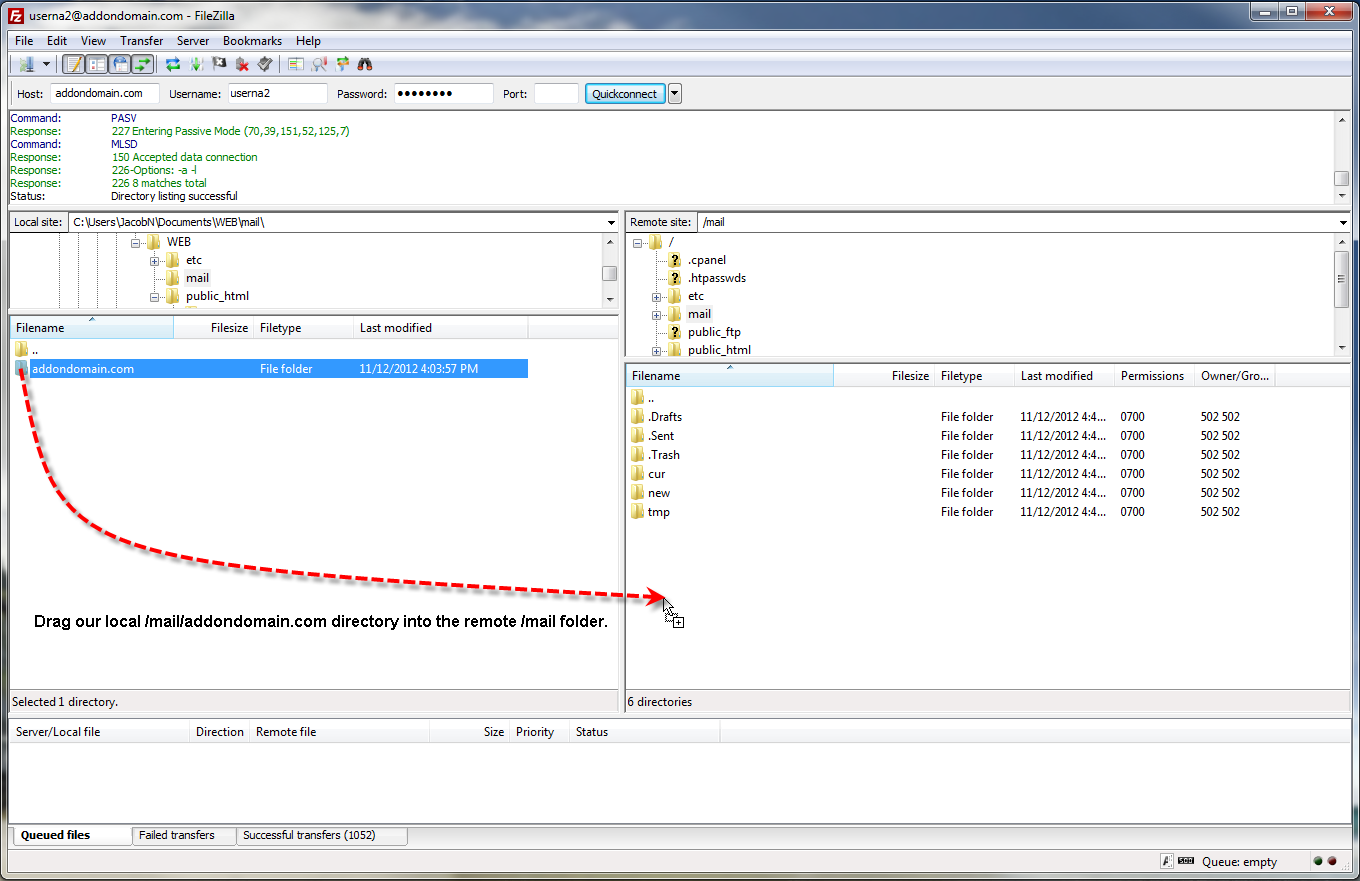
- Next navigate to the mail directory in both windows, then drag the AddonDomain.com directory from the left pane into the right.
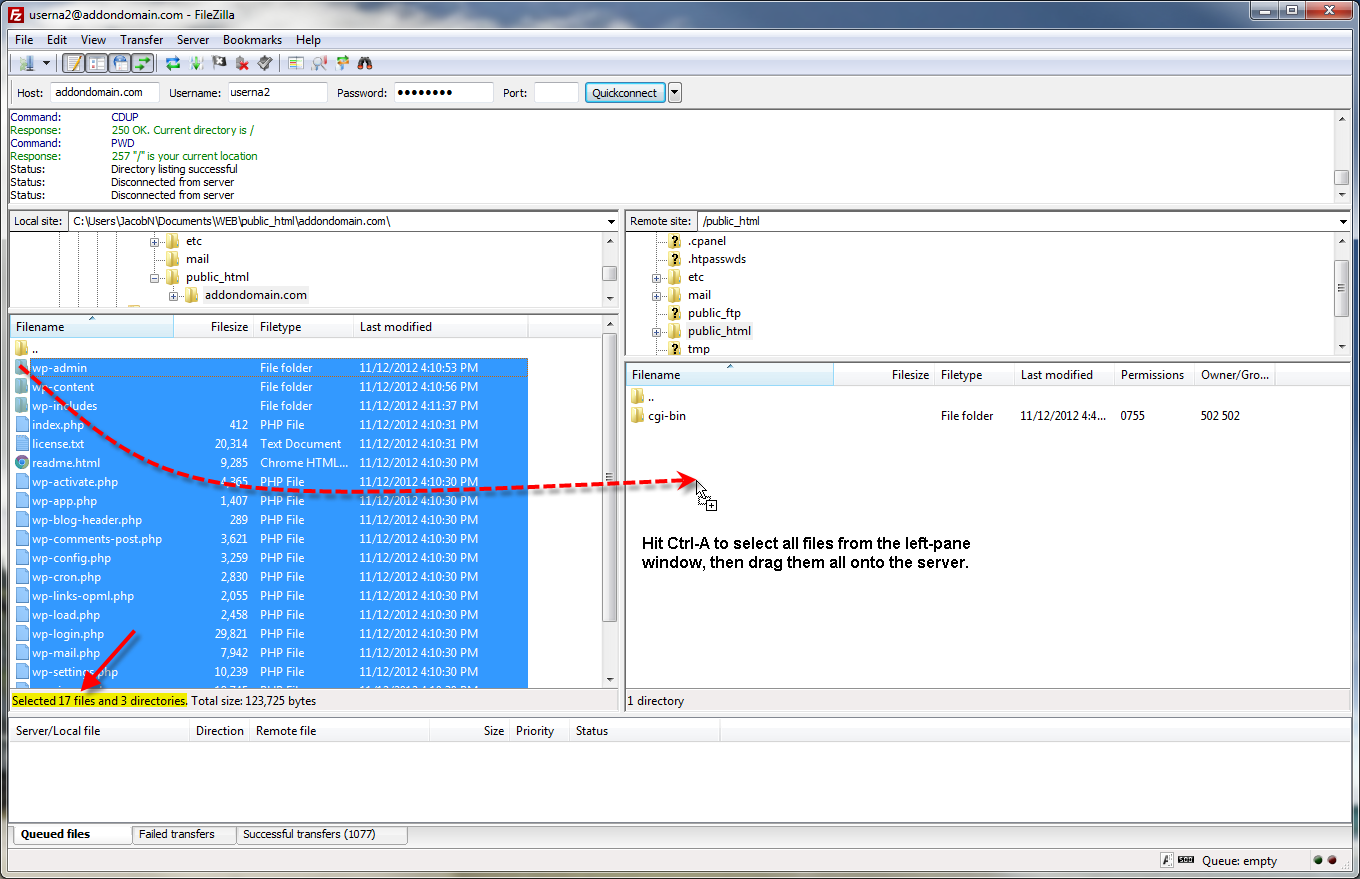
- Now navigate to the public_html directory in both windows, then into the AddonDomain.com directory in the left-hand pane. Still in the left-hand pane hit Ctrl-A on your keyboard to select all files, then drag those files into the right pane.
- Now you’ll want to login to your cPanel with the new username you created.
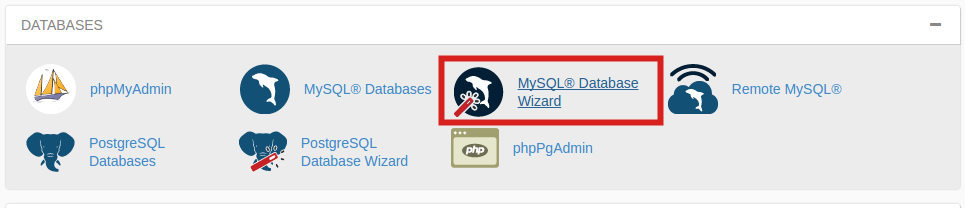
- Under the Databases section click on MySQL Database Wizard.
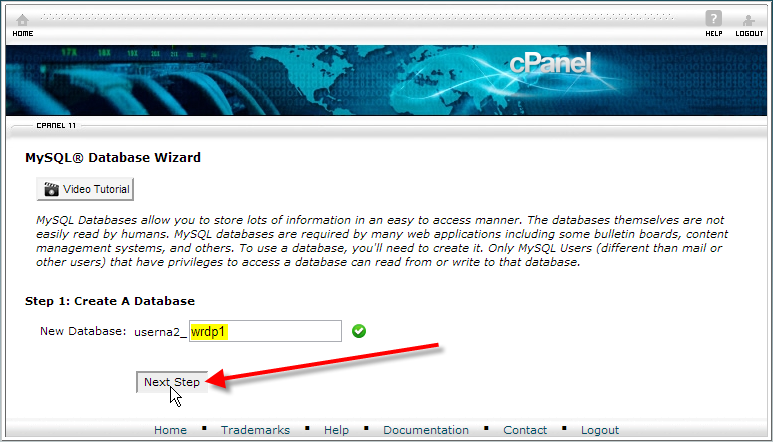
- Enter in a database name, then click on Next Step.
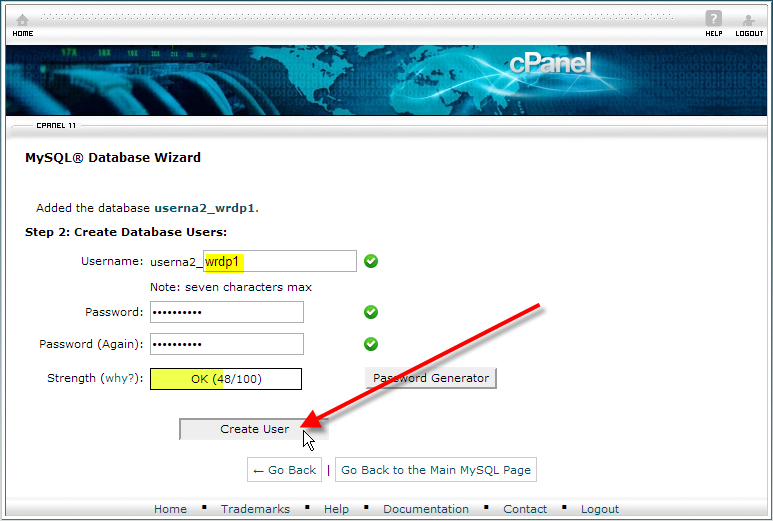
- Enter in a database username and password, then click Create User.
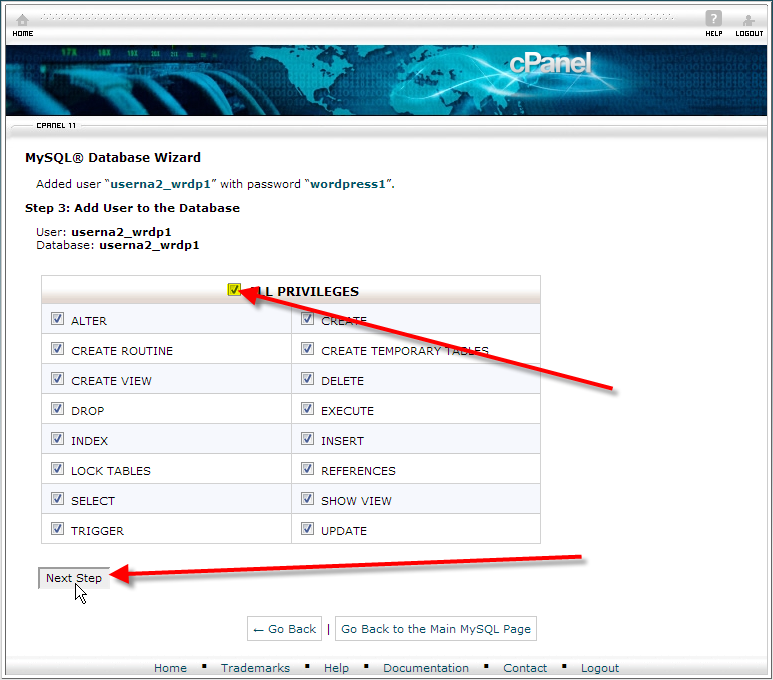
- Place a check beside All Privileges, then click Next Step.
- Back at the cPanel home screen, under Databases, click on phpMyAdmin.
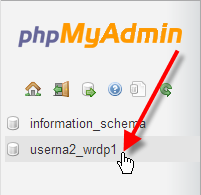
- From the left-hand menu, click on our userna2_wrdp1 database we created.
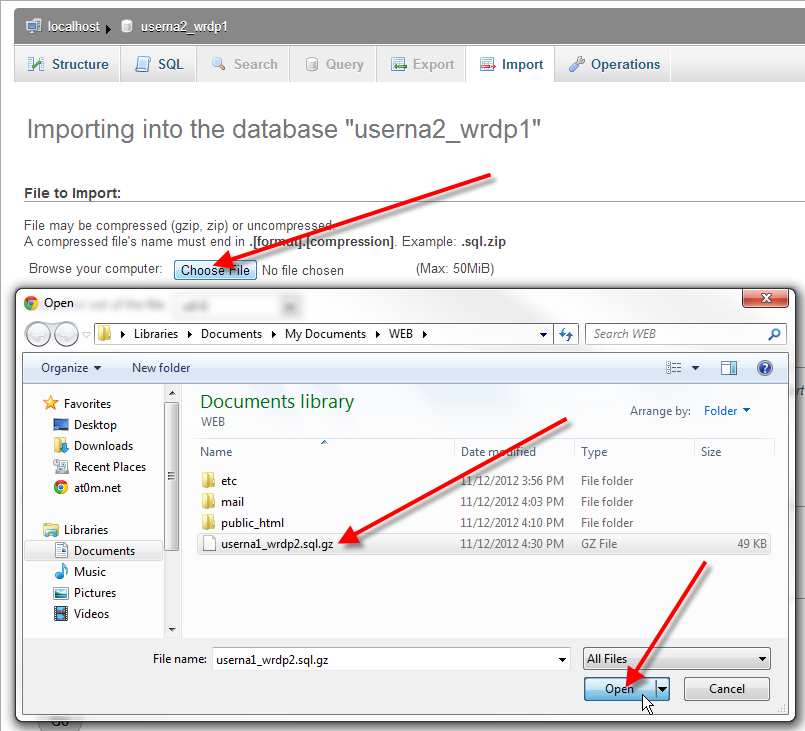
- Click on the Import tab at the top, then click on Choose File to browse for the backup we created earlier.
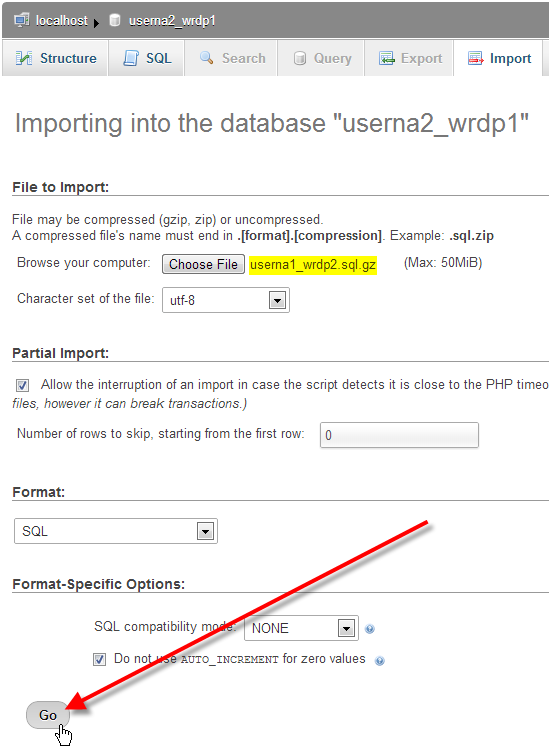
- You should now see your selected backup filename, then click Go.
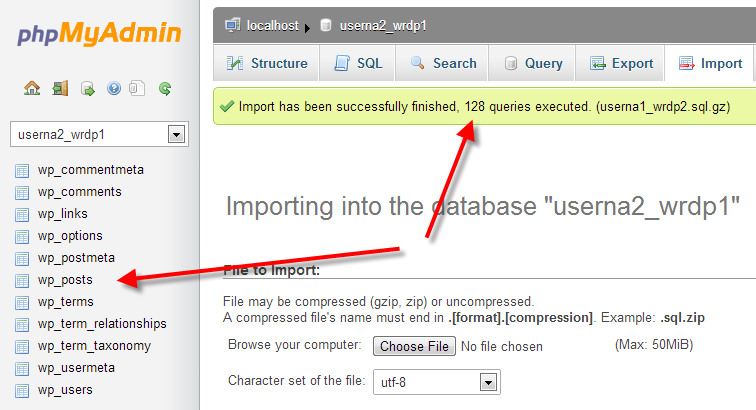
- You should now notice the import was successful by the status message at the top, also our tables now display under our database in the left-hand menu.
- Now because we switched cPanel usernames from userna1 to userna2 we need to update any database configuration scripts to use this new user so when we git rid of the old one it still can function on its own.Back in cPanel, under the Files section click on File Manager.
- In the pop-up select Home Directory, and then click Go.
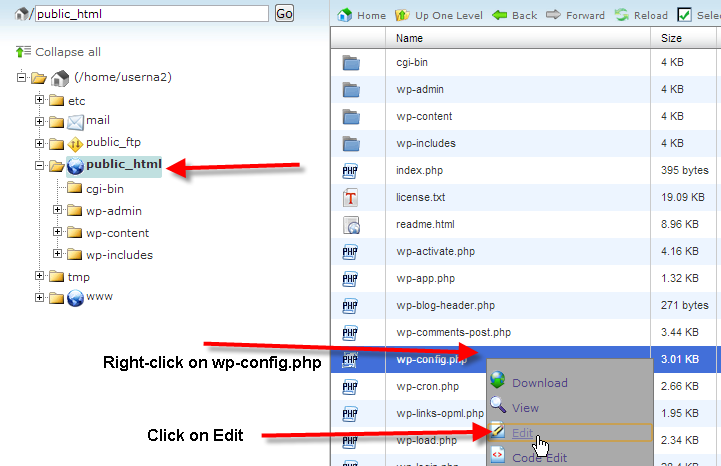
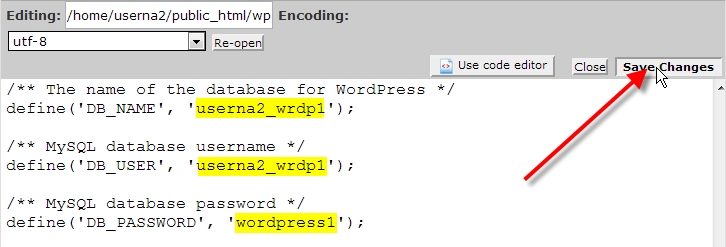
- In the left-hand pane click on public_html, then in the right-hand pane right-click on wp-config.php and then click on Edit. In the Text Editor window that pops-up, click on Edit.
- Find the database configuration lines, which in a WordPress wp-config.php script should look like:
/** The name of the database for WordPress */Now update these values with your new username and database name and password if you changed it:
define('DB_NAME', 'userna1_wrdp2');
/** MySQL database username */
define('DB_USER', 'userna1_wrdp2');
/** MySQL database password */
define('DB_PASSWORD', 'wordpress2');/** The name of the database for WordPress */Finally click on Save Changes.
define('DB_NAME', 'userna2_wrdp1');/** MySQL database username */
define('DB_USER', 'userna2_wrdp1');
/** MySQL database password */
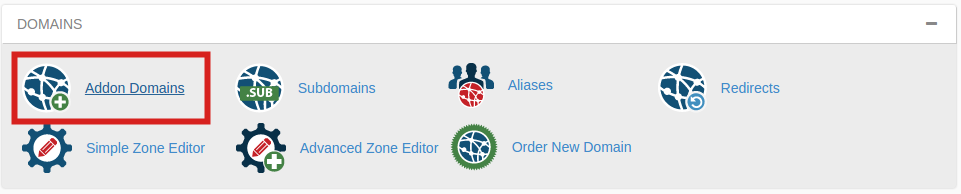
define('DB_PASSWORD', 'wordpress1'); - Now you’ll want to login to your original cPanel account again to remove the AddonDomain.com from the account, so that we can modify the one we created on our new account.To start this process under the Domains section click on Addon Domains.
- Beside AddonDomain.com click on Remove.
On the confirmation screen click on Remove “AddonDomain.com”. - Now that the domain is removed from our userna1 cPanel account, we’ll want to log back into WHM so we can modify our userna2 account to use that domain.In the top-left Find box type in modify, then click on Modify an Account.
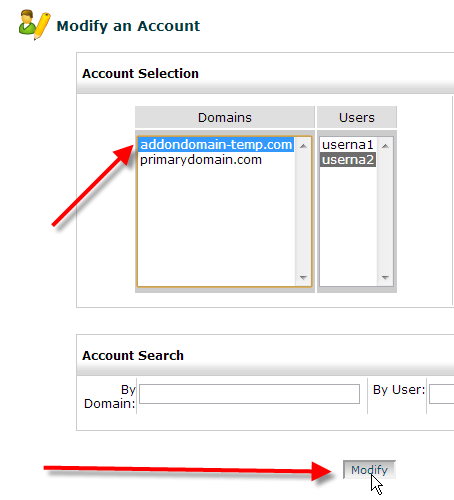
- Click on our AddonDomain-temp.com domain, then click on Modify.
- Now change the domain entry in the Primary Domain: field to AddonDomain.com, then scroll to the bottom and click on Save. You should see a green Success! status display when it’s done.
That should complete the process of splitting one cPanel account into multiple ones. After you’ve got everything running under the new separate cPanel account, you can go back through the original account and remove the files in the /etc, /mail, and /public_html directories for the old addon domain. You can also go remove the original MySQL database as well now that you have a separate standalone one for your new account.