Once you have enabled AutoSSL, which provides free SSL that remains enabled indefinitely, in your WHM account, the next step is to confirm that the certificates have been added to your account. You can manage these certificates using the SSL/TLS interface in cPanel. This information is applicable to both Shared Business Hosting customers and Reseller customers.
It’s important to note that using free AutoSSL certificates with a shared IP address may result in a warning from web browsers that do not support SNI (Server Name Indication). This warning could lead to false security warnings for users who access your SSL websites. Microsoft® Internet Explorer™ on Windows XP™ is the most commonly used web browser that does not support SNI. Please keep this in mind when considering the use of free AutoSSL certificates with a shared IP address.
- Adding an SSL Certificate
- Forcing the option to Run AutoSSL
- Deleting an AutoSSL Certificate
- How to Check AutoSSL On The Command Line
How to Add a Certificate using AutoSSL
Enabling the AutoSSL option “Allow AutoSSL to replace invalid or expiring non-AutoSSL certificates” will automatically replace any expired certificates on your server. This means you won’t need to manually install the certificate. It’s important to note that this option is not enabled by default as it could potentially replace EV (Extended Validation) or OV (Organization Validation) certificates with DV (Domain Validation) certificates, which have a lower level of validation.
- Login to the cPanel.
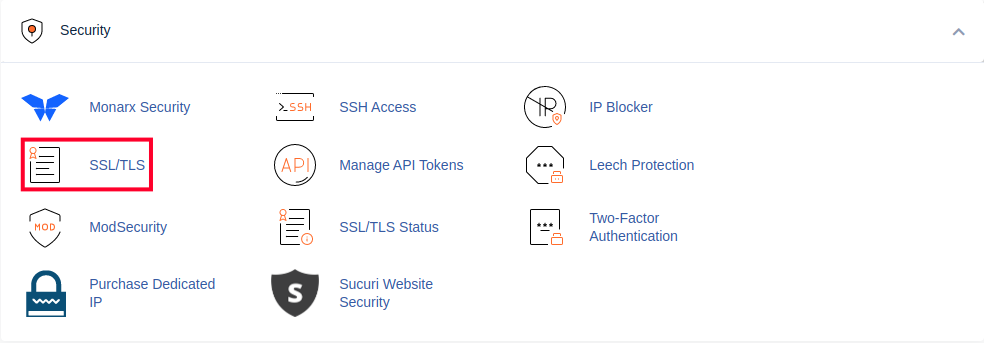
- Scroll down and click the SSL/TLS icon in the Security section.
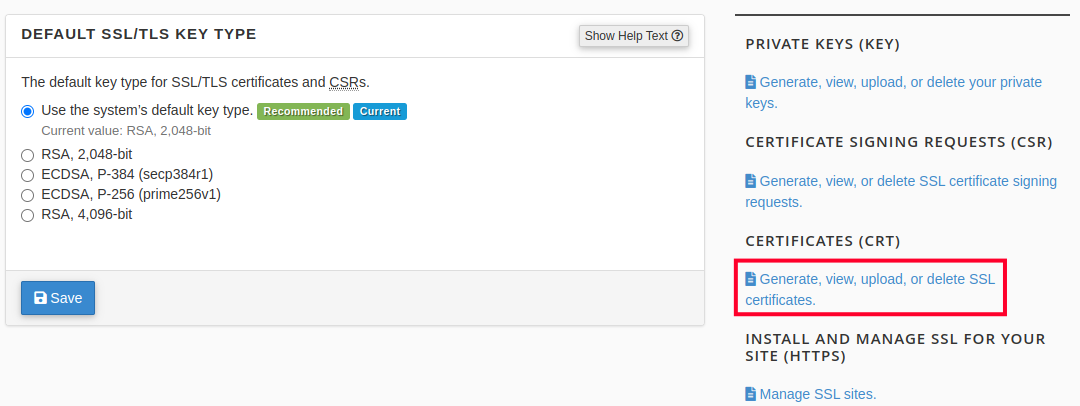
- Click the Generate, view, upload, or delete SSL certificates link under Certificates (CRT).
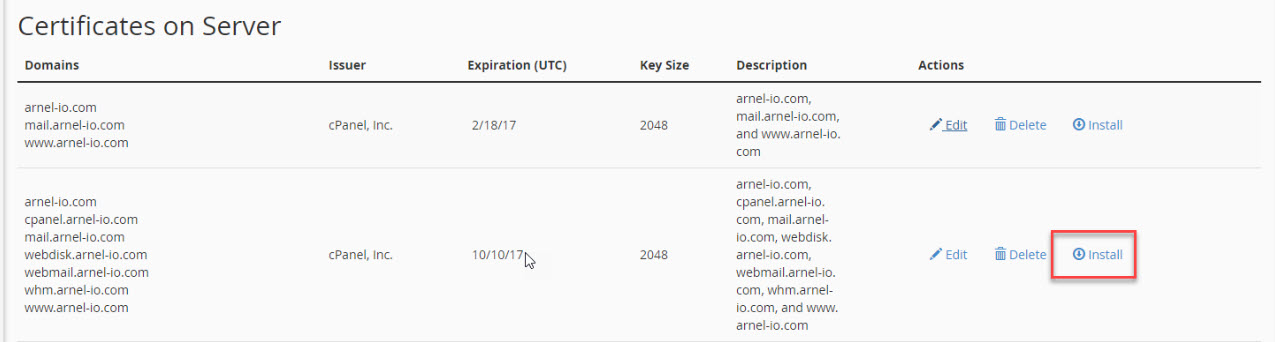
- Scroll down the list until you find the domain that needs to have the certificate installed. Click on the Install link in order to make sure that the certificate is installed.
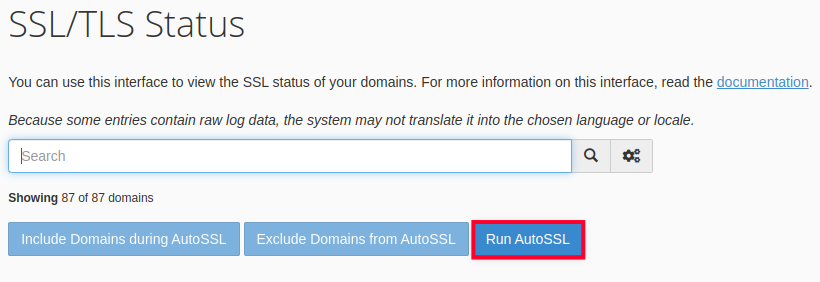
- In order to see if the certificate has been applied, you can return to the main cPanel page and then click on SSL/TLS Status. Scroll down and you can see if a green padlock is applied to the URL where you installed the certificate.
Run AutoSSL in SSL/TLS Status Section
If AutoSSL doesn’t install on a specific domain, you can also force the installation in the SSL/TLS Status section.
- Login to the cPanel.
- Click the SSL/TLS link in the Security section.
- Click the Run AutoSSL button.
How to Delete an AutoSSL certificate
Enabling the AutoSSL option “Allow AutoSSL to replace invalid or expiring non-AutoSSL certificates” will automatically replace any certificate and apply certificates to all domains within the account. This means that if you have multiple domains and only intend to have SSL for some of them, you should turn this option off to avoid having SSL applied to all domains.
- Login to the cPanel
- Scroll down and click the SSL/TLS icon in the Security section.
- Click the Generate, view, upload, or delete SSL certificates link under Certificates (CRT).
- Scroll down until you find the domain name with the certificate you wish to delete. To the right, click the Delete link.
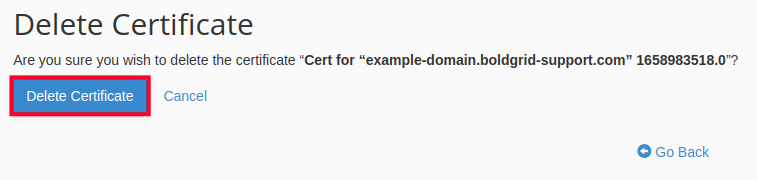
- You will then see a message asking if you are sure you want to delete the certificate. Click the Delete Certificate button to proceed. You are finished when you see a message stating that it has been deleted.
Congratulations, you know how to add or delete SSL certificates in the cPanel interface. For more information please see our SSL Tutorials.
But wait, there’s more…
How to Check AutoSSL On The Command Line
For users who prefer working on the command line, a cPanel script is available to check SSL status. This script is run on a daily cron job, but can also be executed manually for troubleshooting purposes in case of unexpected issues. This is a convenient option to speed up various tasks for users who prefer working on the command line.
Using the cPanel AutoSSL Script
To run this script, log into your server via SSH, and type in the following:
/usr/local/cpanel/bin/autossl_check
Useful Options
You can check SSL for a specific user using the --user option:
/usr/local/cpanel/bin/autossl_check --user=username
Likewise, you can check all domains in your cPanel configuration:
/usr/local/cpanel/bin/autossl_check --all