In this piece, we will explore the process of installing and configuring the ClamAV plugin for cPanel. ClamAV is a widely used open-source anti-virus scanner that, with the ClamAV plugin, enables cPanel users to scan their email and home directories for potentially harmful files.
To install this plugin on your own, you must have root access to your Virtual Private Server (VPS) or dedicated server. Alternatively, you can reach out to our support team, and we can install the ClamAV anti-virus plugin for you for a $25 installation fee. Follow the instructions below to install the virus scanner in cPanel and conduct a site scan.
Install and configure ClamAV plugin in WHM
- Log into WHM as the root user.
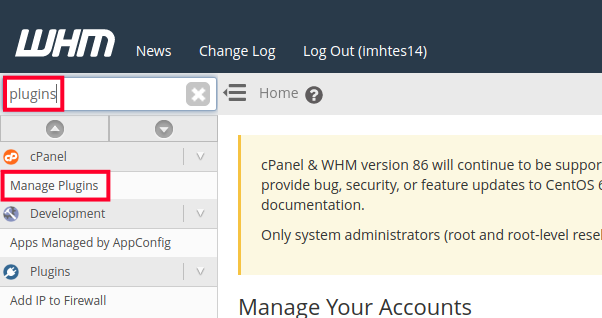
- In the top-left Find box, type in plugins, then click on Manage Plugins.
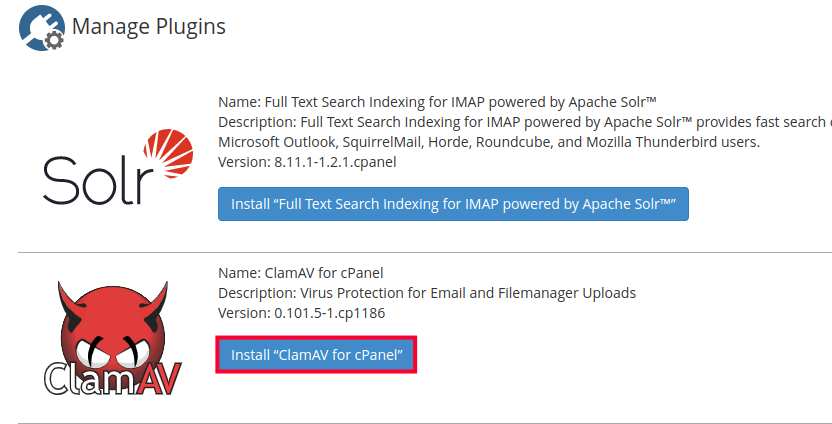
- Click the Install ClamAV for cPanel button.
The installation process can take a good amount of time, upwards of 10 minutes, so be patient and don’t close the web browser until it completes. When it finishes you’ll see a “ClamAV for cPanel” is now installed message at the bottom of the screen.
- Log out, and then back into WHM as the root user again.
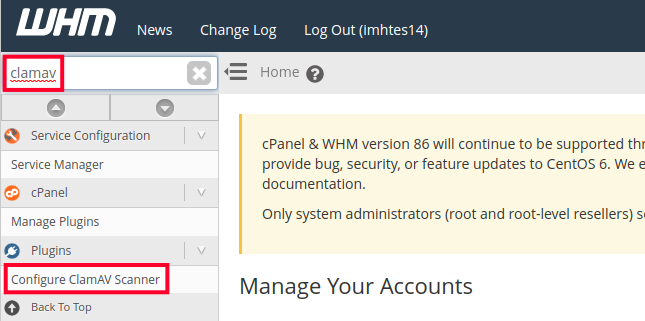
- In the top-left search box, type in clamav, then click on Configure ClamAV Scanner.
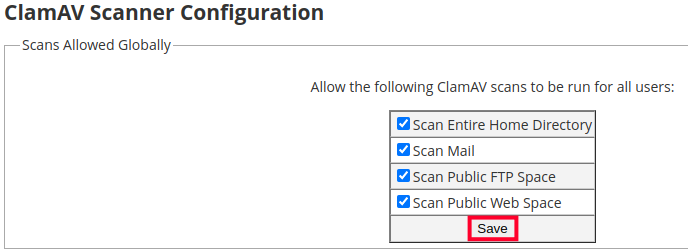
- Now you can set the global scan permissions you’d like to set. If you’d simply like to allow any cPanel user to scan any of their stuff you can place a check beside Scan Entire Home Directory, Scan Mail, Scan Public FTP Space, and Scan Public Web Space, then click on Save.
Run ClamAV Virus Scan From cPanel
- Now login to your cPanel to use the virus scanner.
- Under the Advanced section, click on Virus Scanner.

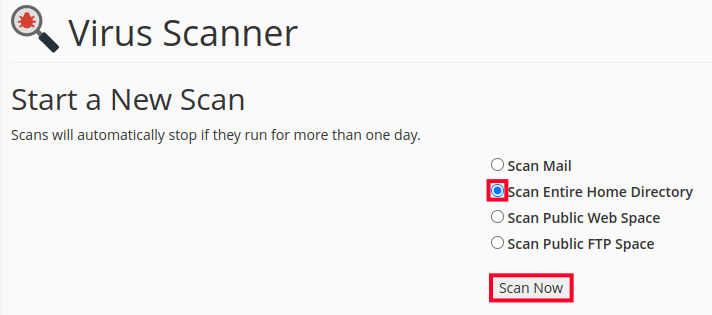
- Now to start a new scan, select the type of scan you want, in this example we’re doing Scan Entire Home Directory, then click on Scan Now.
- After the scan is complete there will be a list of infected files in the Infected Files: section, click OK on the confirmation window that pops up to continue.
- In my test, all 3 of the files that were found are coming up for known variants of a PHP mailer or PHP shell, so we can just leave the selections in the Quarantine column to place these files outside of our /public_html directory so they are not still accessible to the outside world. We could also just outright Destroy them, or Ignore them by changing our selection to those columns. Then simply click on Process Cleanup. You should then see the cleanup process complete page.
- Now if you use cPanel’s File Manager you can navigate to the newly created quarantine_clamavconnector directory in your home directory to see the quarantined files.
Run ClamAV Scan From Console (SSH)
- Login to your server via SSH.
- Run the following command to scan the entire /home/userna5/public_html directory:
Copyclamscan -ri /home/userna5/public_htmlThe r flag is for recursive, and the i flag is to only show infected files. You should end up with a listing of any infected files that were found such as:/home/userna5/public_html/uploads/mail.php: PHP.Mailer-7 FOUND
/home/userna5/public_html/uploads/sh.php: PHP.C99-13 FOUND
/home/userna5/public_html/uploads/view.php: PHP.C99-13 FOUND
----------- SCAN SUMMARY -----------
Known viruses: 1324142
Engine version: 0.97.6
Scanned directories: 4979
Scanned files: 13835
Infected files: 3
Data scanned: 583.20 MB
Data read: 1193.90 MB (ratio 0.49:1)
Time: 372.032 sec (6 m 12 s) - To see all of the options available to you for the clamscan command append the –help flag.Copyclamscan –help
You should now understand how to install and configure the ClamAV plugin for cPanel to help protect your accounts against virus threats.
