Before addressing how to disable cPanel in a Dedicated Hosting Server, it is essential to understand the fundamental web service solution model. This model is referred to as LAMP, which represents the Linux operating system, Apache HTTP Server, MySQL relational database management system, and PHP programming language. It is commonly referred to as the “web stack” or “LAMP stack.” The purpose of cPanel is to offer an interface for the average web server user.
During the installation process of cPanel, modifications are made to the Linux operating system (CENTOS) and other components of the LAMP stack to ensure compatibility with cPanel and provide a user-friendly interface. According to their documentation, cPanel is not easily removable once installed.
- Can cPanel be Disabled from a Dedicated Hosting Server?
- Enabling or Disabling the Features of cPanel
Can cPanel be Disabled from a Dedicated Hosting server?
In short, it is possible to remove cPanel from the server. However, doing so and utilizing the existing Apache, MySQL, and PHP services will result in complications since the LAMP stack components were customized to function specifically with cPanel. Alternatively, one can opt to use a different operating system or a version of CENTOS that is not dependent on cPanel.
To remove cPanel and switch to another operating system, it is advisable to reach out to the Managed Hosting team for guidance and assistance. The process may require reinstalling the server with the desired operating system. For VPS servers, this change can also be made upon request.
It’s important to note that modifying the server by using different operating systems or customizing it in any way may restrict the available support options for the dedicated server account. While hardware support will still be available, technical support for software-related issues will be limited to restarting the server. Therefore, it’s advisable to carefully consider the implications before making any major modifications to the server.
Enabling or Disabling the Features of cPanel
It is possible to enable or disable cPanel features using the Web Host Manager (WHM). However, root access to a VPS or Dedicated Hosting account is required to make these changes.
Steps to Enable or Disable cPanel Features
- Log in to WHM as Root.
- Click in the search field in the top left corner and type Feature.
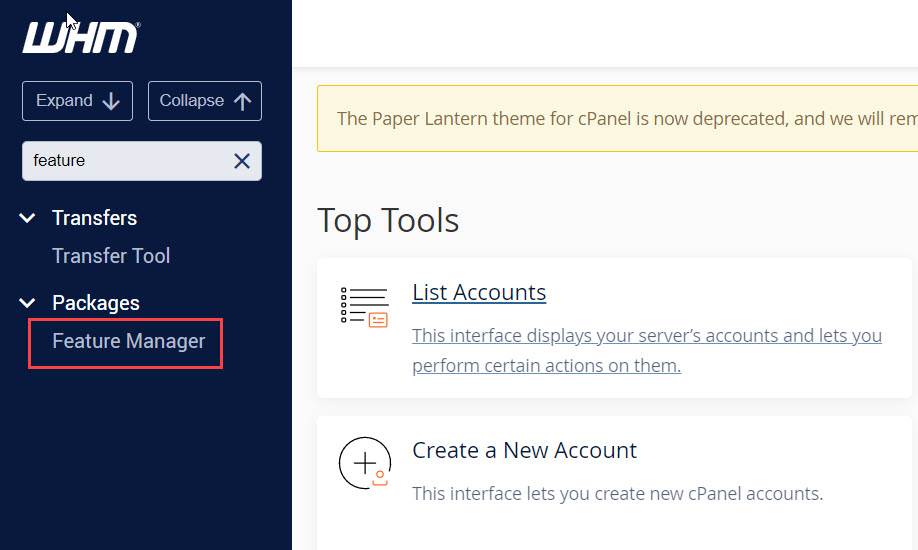
- To access the Feature Manager page, click on it. Here, you will find three default feature lists, and you can choose to either create a new list or edit an existing one.
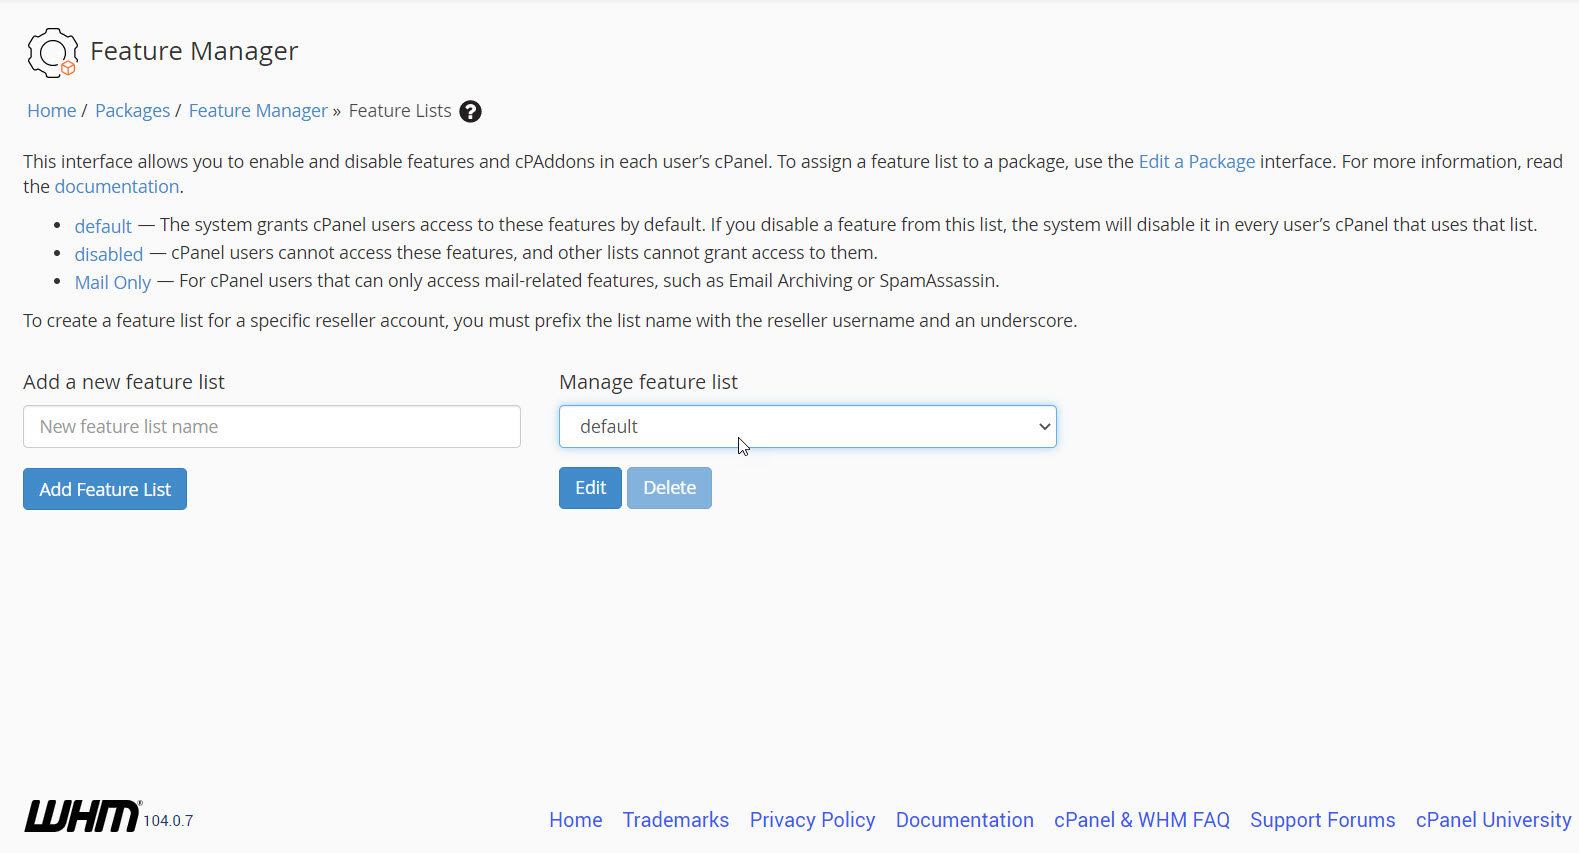
- On the Feature Manager page, the “Add” option is located on the left, and the “Edit” option is on the right-hand side. To select a feature list to edit, click on the drop-down arrow and choose the desired list. Once you have selected a feature list, click on “Edit” to make changes. An example of a feature list that you may see is shown below:
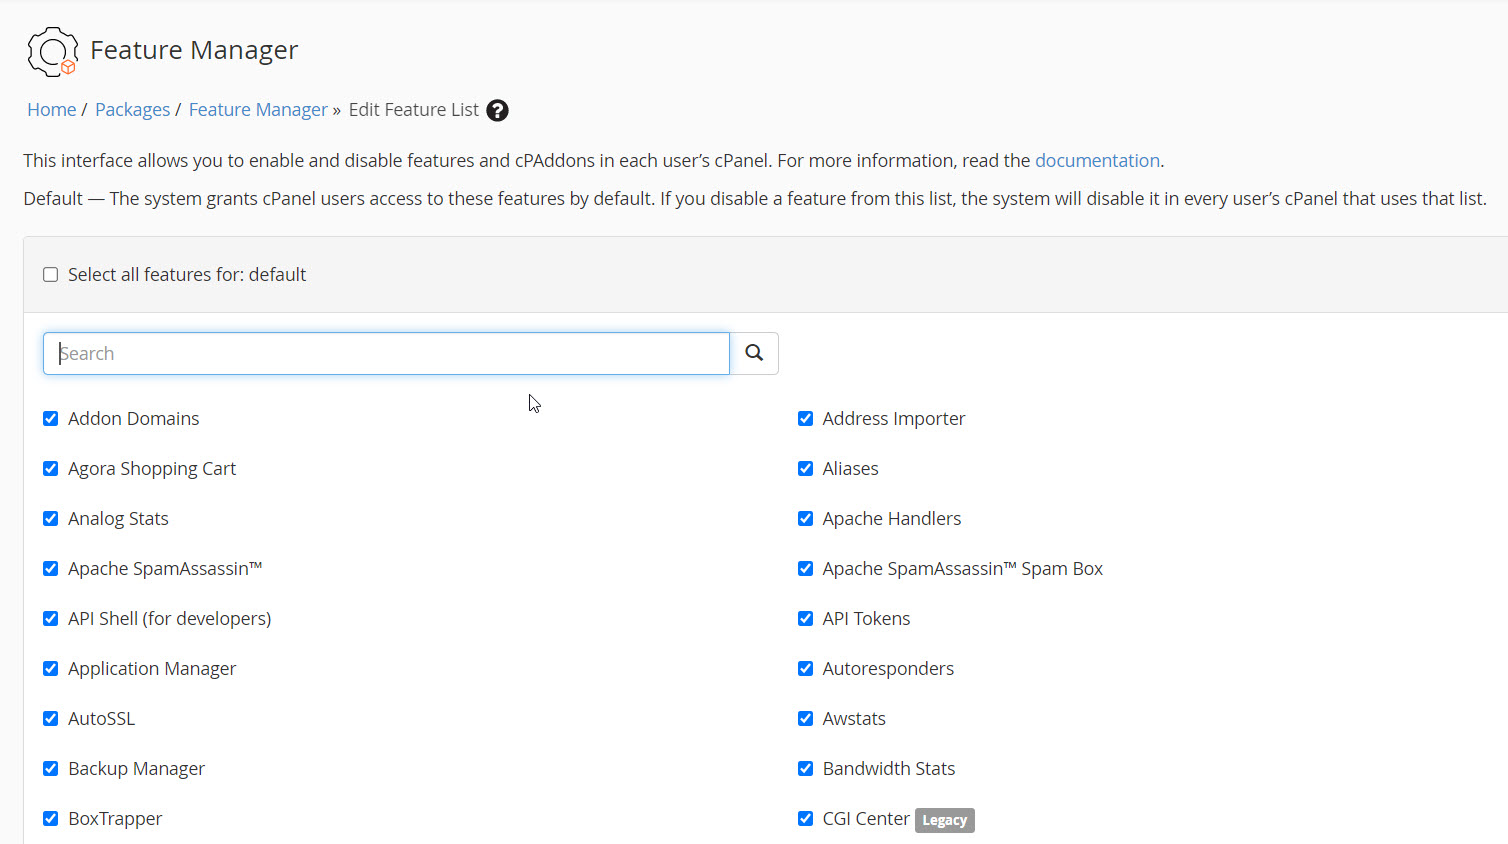
Here you can enable or disable a feature by clicking on the checkbox. - Once you’re done editing or adding a feature list, scroll all the way down and click on the blue SAVE button.
For more information on Dedicated Hosting with InMotion Hosting, please refer to our knowledge base. Our Dedicated Hosting options include Managed Dedicated Servers powered by cPanel, and Bare Metal Servers for complete server control via the command line. Our dedicated hosting plans also offer features such as DDoS protection, 99.99% uptime, software RAID, and new customer discounts.
To explore our Dedicated Hosting options and learn more, please visit our website.