The cPanel provided by your WordPress-optimized server is equipped with Nginx, a robust caching proxy that sits in front of Apache. This translates to faster page loading times for your visitors with minimal input required from you.
In your role as a site administrator or developer, you now have access to an array of new tools within your WordPress-optimized cPanel.
What Does This Cache Do?
For those who are new to WordPress, it’s important to understand what caching is and why it’s crucial for your site. However, experienced users can skip ahead to the Cache Manager features in cPanel.
WordPress utilizes PHP (a scripting language) and MySQL (a database) to generate pages that are similar to basic static HTML pages. The process of creating a page consumes server computing power. Once the page has been created, there’s no need to regenerate it unless modifications have been made. If nothing has changed, Nginx can “cache” the complete page and store it for later use. This allows the page to load faster from the cached resource.
In the next section, you will discover how to utilize caching resources intelligently. Nginx can detect any changes made to a page and automatically reload those changes into the cached file. However, if you make frequent site changes and want to see immediate results, you can continue reading to learn how to temporarily suspend caching.
Cache Manager Features
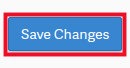
Your WordPress-optimized server is equipped with a powerful Cache Manager tool that enables you to manage cached resources intelligently. In the following sections, we will introduce you to several key features of the Cache Manager. Be sure to click the “Save Changes” button after making any modifications.
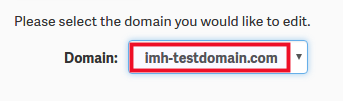
Selecting a Domain
If you’re handling multiple domains in your cPanel, you can easily choose the one for which you want to manage cache.
Purge URL
You have the option to purge the cache for a single page using the Purge URL option. Simply paste the URL of the page to purge and click the Purge button.

Enable Caching
If you’re making numerous significant changes to your site and want to see the updates immediately, you can disable caching. This will halt caching while you work on the site, allowing you to view modifications without the need to frequently flush the cache.

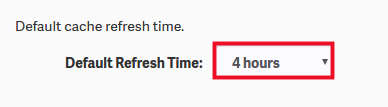
Default Refresh Time
The default refresh time tells the caching service how long it should wait before checking for updates to your website.
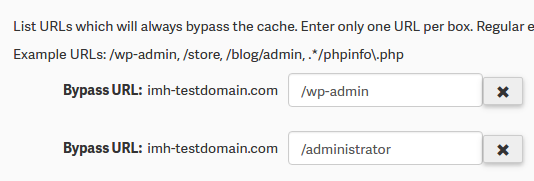
Bypass URL
The bypass URL setting instructs the caching service to never cache certain URLs. These URLs will always be loaded directly from the server and not from the page cache. To add a new URL, click the “+” button. Conversely, to remove a URL, use the “X” button.
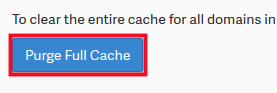
Purge Full Cache
There may be occasions in which you want to apply changes to all domains. The Purge Full Cache button will effectively purge the cache for all domains owned by your cPanel user.
Looking for more guides? We have over 400 WordPress How To Articles to help you!