This article aims to introduce a more advanced technique for consolidating multiple cPanel accounts into a single one. This method is particularly useful for those who are contemplating switching to shared hosting or want the convenience of managing multiple sites from a single cPanel account. However, it’s important to note that having multiple cPanel accounts is only possible with VPS or dedicated server plans.
For the purpose of this tutorial, let’s assume that we have two cPanel accounts – userna1 with the domain name PrimaryDomain.com and userna2 with the domain name AddonDomain.com. Our goal is to merge the AddonDomain.com domain into the userna1 cPanel account, enabling both domains to be managed using a single login.
To accomplish this, we must first obtain a copy of the MySQL database associated with the AddonDomain.com site. Additionally, we need to update the database credentials in any scripts after transferring the files to the userna1 account, given that the AddonDomain.com site is built on WordPress.
It’s worth noting that the creation of cPanel is no longer unlimited. For more information on cPanel pricing changes and related FAQs, please refer to the official website.
It’s essential to have root access to your server to follow these steps. If you don’t have root access, we recommend that you review our basic guide on merging multiple cPanel accounts into a single one.
- Login to your server via SSH as the root user.
- You’ll want to find the document root for our AddonDomain.com domain then change to that directory with these commands: <code”>grep addondomain.com /etc/userdatadomains </code”>Which should give back:
addondomain.com: userna2==root==main==addondomain.com==/home/userna2/public_html==70.39.151.52:80==Next change to the directory in-between the ==’s with:cd /home/userna2/public_html - Next we’ll want to look for any database configuration files. This can be accomplished by looking for the username followed by an underscore _ using the following command:
grep userna2_ . -RHWhich should spit back:./wp-config.php:define('DB_NAME', 'userna2_wrdp1');Now we can see because this is using a wp-config.php script that these are the database credentials for a WordPress site. You’ll want to open up this file with your favorite text-editor and copy down the values for DB_NAME, DB_USER, and DB_PASSWORD for use later.
./wp-config.php:define('DB_USER', 'userna2_wrdp1'); - Now that we know the database name we can backup that database using the following command:
mysqldump userna2_wrdp1 > ~userna2/userna2_wrdp1.sql - Now you’ll want to start copying over all of the data from the userna2 account to the userna1 account using the following commands:
cp -frp ~userna2/etc/addondomain.com ~userna1/etc/cp -frp ~userna2/mail/addondomain.com ~userna1/mail/cp -frp ~userna2/mail/.*@addondomain_com ~userna1/mail/cp -frp ~userna2/public_html ~userna1/public_html/addondomain.com - Next we’ll want to temporarily modify our AddonDomain.com domain so that we can add it to our userna1 cPanel account. To do this log into WHM.
- In the top-left Find box type in modify, then click on Modify an Account.
- Select AddonDomain.com, then click on Modify.
- In the Primary Domain: field add a -temp.com suffix to your domain, so in this case we use AddonDomain-temp.com. Then scroll to the bottom and click on Save.
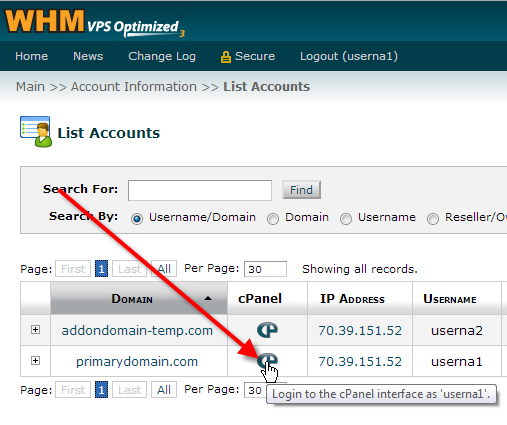
- Still in WHM in the top-left Find box type in List, and then click on List Accounts.
- Now click on the cPanel icon for the PrimaryDomain.com account with the username userna1.
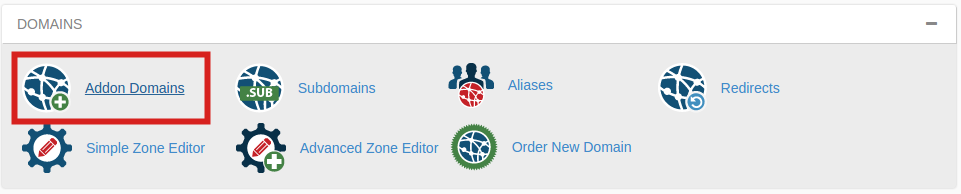
- Under the Domains section, click on Addon Domains.
- Now type in AddonDomain.com as the new domain name, and choose a FTP username and document root for the site as well then click on Add Domain.
- Now that you have all of your website data loaded under the userna1 cPanel account the next thing you need to do is restore your MySQL database that you backed up. To do this login to your cPanel with the userna1 username.
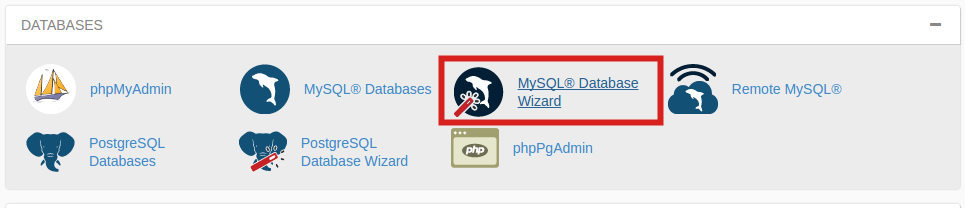
- Under the Databases section click on MySQL Database Wizard.
- Now in this case I already know the userna1 user has one WordPress site and database already, so I’ll be naming my database userna1_wrdp2, then click on Next Step.
- I’m also going to set my database username to userna1_wrdp2, give that user a password then click on Create User.
- Finally on the last step of the database wizard, click on ALL PRIVILEGES to check everything, then click on Next Step.
- Now back in your SSH session you can import the MySQL database backup using the following command:
mysql -u userna1_wrdp1 -p userna1_wrdp1 < ~userna2/userna2_wrdp1.sqlAt the Enter password: prompt enter in the password that you copied down earlier. - Now we want to correct all of the ownership permissions for the userna1 user using the following command:
fixperms userna1 - Now that you have your website data copied over, and the MySQL database imported you’ll want to modify your database credentials in the ~userna1/public_html/addondomain.com/wp-config.php script or any other database configuration scripts you found to use the userna1 cPanel username instead of the userna2 one. That way when you get rid of the userna2 account the database will continue to function as its own separate entity.
- Finally you can log into WHM once more to remove the old standalone userna2 account.
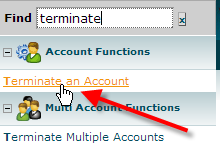
- In the top-left Find box, type in terminate, then click on Terminate an Account.
- Click on the AddonDomain-temp.com domain, then click on Terminate at the bottom of the page.
If you followed all of those steps you should have now successfully merged your AddonDomain.com site from the userna2 cPanel account, into the userna1 one. You could simply keep repeating this process again and again to get multiple cPanel accounts all merged down into one.