Typically, the most efficient and straightforward way to establish a database in cPanel is by utilizing the MySQL Database wizard. This approach not only generates the database but also generates a user for that database. However, in some instances, you may require either adding a database user to a database or creating a single user to include in multiple databases. In such cases, the manual creation of the users becomes necessary. This article provides a step-by-step guide on creating and attaching a database user in cPanel.
Creating the database user
- Log into your cPanel dashboard.
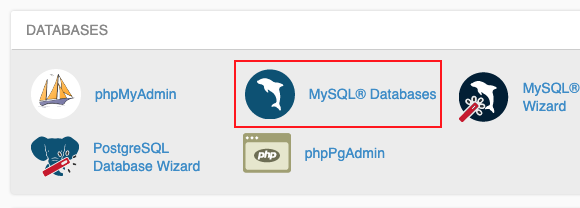
- Locate the Databases icon from your main cPanel page and click on the MySQL Databases icon.
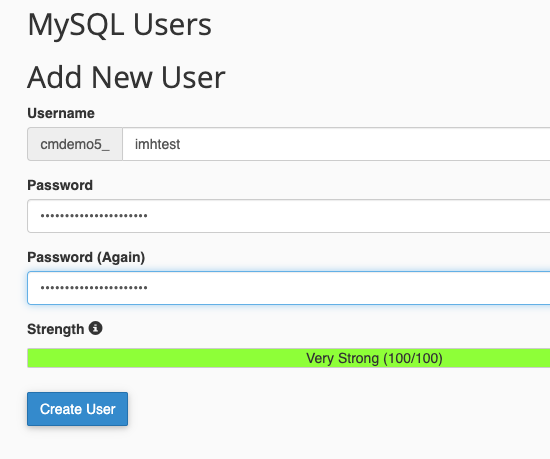
- Once inside the database area, scroll down until you see the MySQL Users Add New User section. From here, you will see the form to create your new user. Note that the database name will always be prefixed with your cpanel username. Add the second portion to create the new database username. For example, our new user will be named inmoti6_imhtest.
- Type in the password you desire for both the Password and Password (Again) fields.
- Click the Create User button to complete the database user creation.
Assign the user to one or more databases
Now that you have created the user, it is time to assign it to the database or databases you wish for it to access. You will begin from the same Database page where you created the user.
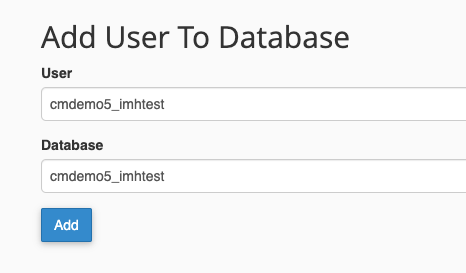
- Locate the Add User to the database section. You will see two dropdowns here. Select your desired user from the top dropdown and the database you wish to add it to from the lower dropdown.
- Click the Add button to save the changes.
- You are brought to a screen that allows you to select privileges. Generally speaking, you will want to click the checkbox for ALL PRIVILEGES. Selecting individual privileges is a customization for advanced users.
- Click the Make Changes button at the bottom to save the user and privileges to the database. You will be able to see the new user in the user list for each database they are assigned to in the database list.
- Repeat steps 1-4 for any additional databases you want to allow the user to have access to.