Managing accounts is a crucial responsibility when it comes to overseeing a dedicated server. To create and manage accounts, you will need to use the Web Host Manager (WHM), which generates cPanel accounts according to a primary domain. After setting up a cPanel account, you can customize it further by utilizing the “Modify an Account” feature within the cPanel. In this tutorial, you will learn about the different sections available to configure each cPanel account.
How to Configure a cPanel Account
You have two options when it comes to configuring an account: you can either do it during the initial creation of the account, or you can make changes after the account has been created. To create a new cPanel account, you need to use the “Create New Account” feature. Alternatively, you can modify the settings of an existing account by accessing the “Modify an Account” section. The instructions provided below will focus on modifying an account.
- Login to WHM.
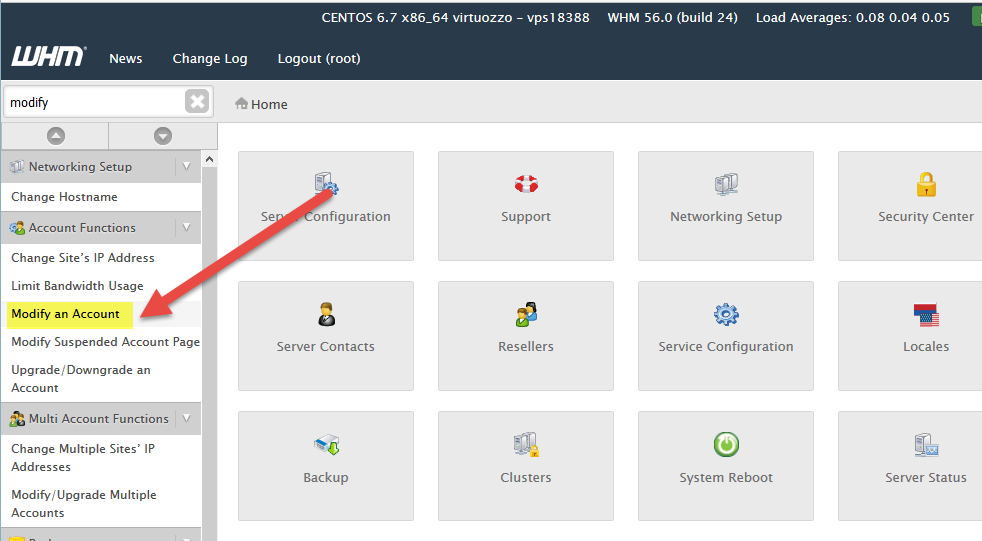
- In the search bar in the top left corner of WHM, type in “Modify an Account.” Click on the menu item when it appears in order to launch it.
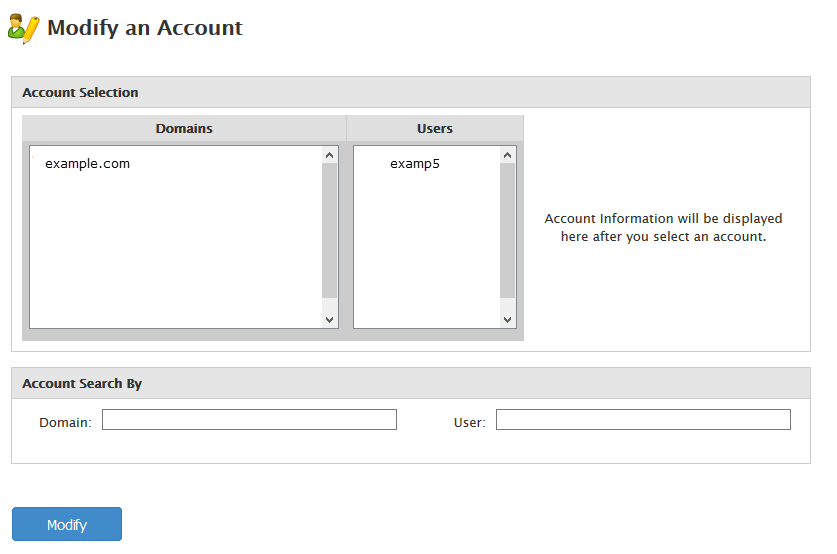
- If you have any user accounts already created, then you will see them listed here. Once you have selected the user or domain, then click on Modify.
- The first section is titled Basic Information. Each section will be listed in a table below and a graphic will show how it appears within WHM. Click on an item in order to modify it.
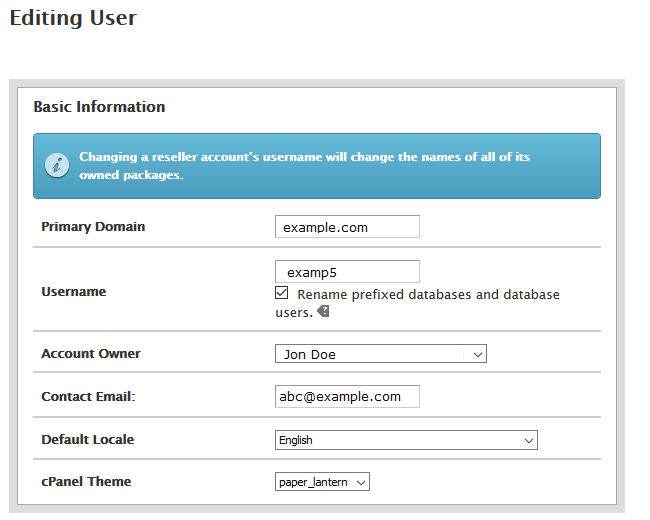
- Primary domain primary domain used to create the cPanel account username username assigned to the cPanel account account OwnerName of the Account OwnerContact EmailContact email for the account owner default LocaleDetermines the language used in cPanelcPanel ThemeTheme for the cPanel appearance after the Basic Information, you will see Resource LimitsPackageName of the package used to create the cPanel accountDisk Quota (MB)Hard drive quota assigned to the account monthly Bandwidth Limit (MB)Bandwidth limit (by month) assigned to the account email AccountsMaximum number of email accounts FTP AccountsMaximum number of FTP accountsMailing ListsMaximum number of mailing lists SQL DatabasesMaximum number of databasesSubdomainsMaximum number of SubdomainsParked DomainsMaximum number of Parked domainsAddon domainsMaximum number of Addon domainsMaximum Hourly Email by Domain RelayedMaximum number emails relayed per hour maximum percentage of failed or deferred messages a domain may send per hour Maximum number of failed email message next section is called Privileges
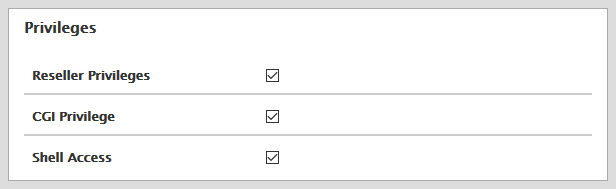
- ResellerPrivileges Allows Reseller privilegesCGI PrivilegesAllows CGI privilegesShell AccessAllows Shell access the last section allows you to modify the DNS settings for email. You can set the DKIM and SPF settings to combat spam. Enable DKIM on this account allows you to enable DKIM settings for email accountable SPF on this account and allows you to enable SPF settings for email accounts
- Once you have finished modifying these settings, click on the blue Save button at the bottom of the page in order to save any change.
How to Manage Bandwidth Limits
That concludes the tutorial on configuring a cPanel account using the “Modify an Account” feature within WHM. If you want to learn more about account creation, we recommend reviewing the “Create cPanel Accounts in WHM” resource for further information.